This feature is only available if you have a license for one of the sharemundo links® 'Enterprise' solutions.
Step 1: After selecting the project for which you wish to create a site report, go to the 'Site reports' section in the left-hand menu ('Project management' section).
Step 2: Click on 'Add a new report' (top right of your screen).
Step 3: Fill in the various fields and click on 'Save report'.
Note: you'll find details of the various fields below the image.
Details of individual fields
- Tour details
- Project: this field is pre-filled with the name of the project preselected in step 1.
- Report title: enter the title of your report
- Weather conditions: enter a description of the weather conditions during the observation(s).
- Date (of observation) : by default, the current date is selected. You can change it by clicking on the calendar
- Participants: select participant(s) from the drop-down menu
- Mailing list: select report recipient(s) from the drop-down menu
- Comments (click on 'Add an observation' to display the dedicated fields)
- Observation: enter observation details
- Supplier: select the supplier from the drop-down menu
- Position: select the position held by the supplier from the drop-down menu
- Date: by default, the current date is selected. You can change it by clicking on the calendar
- Correction: enter details of the correction made.
- Approved: tick the box if you approve the correction made
- Images: you can upload images or .PDF files to be attached to the report.
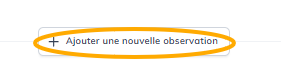
- You can add several observations per report. To do so, click on 'Add a new observation'.
Note The report created will automatically be saved in the 'Site reports' folder of the project documents.